Showing posts with label paintings. Show all posts

Wednesday, May 25, 2016

Making Traditional Gessoed Panels

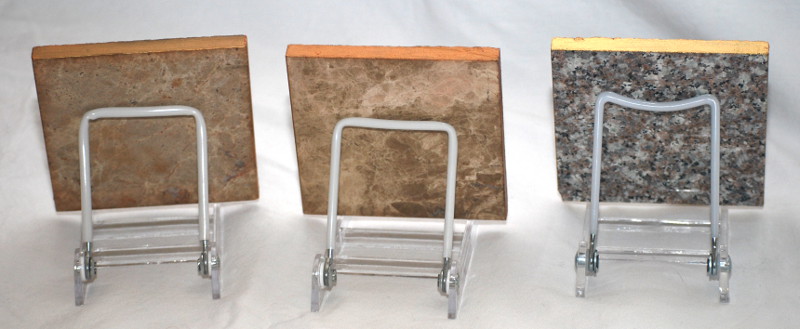
 For this project, I decided to make panels with traditional preparation methods and gesso.  I chose poplar panels as this was a common wood used for panels in period, particularly in southern Europe.

 Step 1: Glue Preparation - I heated rabbitskin glue (RSG) and water in a double boiler according to directions on the package.  A couple of coats of this was brushed on to all surfaces of the panels. 

Heating the rabbitskin glue in a double boiler.


Sizing poplar panels with rabbitskin glue.


  Step 2: Applying the Linen - prior to gluing, I had cut linen to the approximate sizes of each panel.  The linen was soaked in the RSG and smoothed over the panels, removing any air bubbles.  I also brushed on an extra coat of RSG atop the linen.  The extra RSG was put into a container in the refrigerator for use in later steps. These panels were allowed to dry for a couple of days.


Applying linen soaked in RSG to the panels.


The dried linen glued to the panels and trimmed.


 Step 3: Slaking Plaster:  1 part plaster of Paris was combined with 4 parts water in a bowl.  A lot of this was needed  for the gesso process so I prepared 5 cups plaster to 5 quarts water.  This is then stirred well and allowed to settle until a layer of water forms on the top.  This is poured off and the process is repeated a few times.  PH strips are used to test acidity - the slaked plaster should test as neutral to be considered done.  The plaster is scooped into a rag, the excess water is squeezed out, and these can be formed into loaves.


Loaves of slaked plaster.


Step 4: Preparing the Gesso - Some of the refrigerated RSG was  reheated in the double boiler, and a couple loaves of slaked plaster was crumbled into it, and whiting (I used titanium dioxide; lead white would have been used in period) was added.  This was mixed well to remove lumps.  I applied one coat to the back of the boards and 8 coats to the front, allowing the coats to mostly dry in between.  This is a long process, and the time between coats gets longer towards the end, as it takes longer to dry; however Cennini recommends to keep going with the process until done.  Keep the gesso mixture on low heat throughout, adding more water, RSG, and plaster as needed.  The extensive coating process is needed, though, as the boards will be scraped smooth later.  These boards should be allowed to dry for at least 2 days after.


8 coats of the gesso mixture applied to the panels.


 Step 5: Scraping the Panels - Wood boards will naturally curve, and after gessoing they will most likely be slightly convex.  However, in looking at panels at museums, many boards are shaped like this and it can be seen that they were like this prior to painting, as there is no cracking to the painted surface that would be expected.  Moreover, often a curvature was provided on the inside border of the frames to accommodate this deformation.
Vine charcoal was ground in a mortar and tied into a rag.  This was pounced over the surface of the panel and a feather was used to spread out the dust. I obtained a long flat scraper from the hardware store and used this, scraping over the entire surface of the panel until all of the charcoal was gone and only white gesso remained.  I sanded the final board with 400 grit sandpaper, for a smooth ivory surface.


The dried panel pounced with charcoal and ready for scraping.


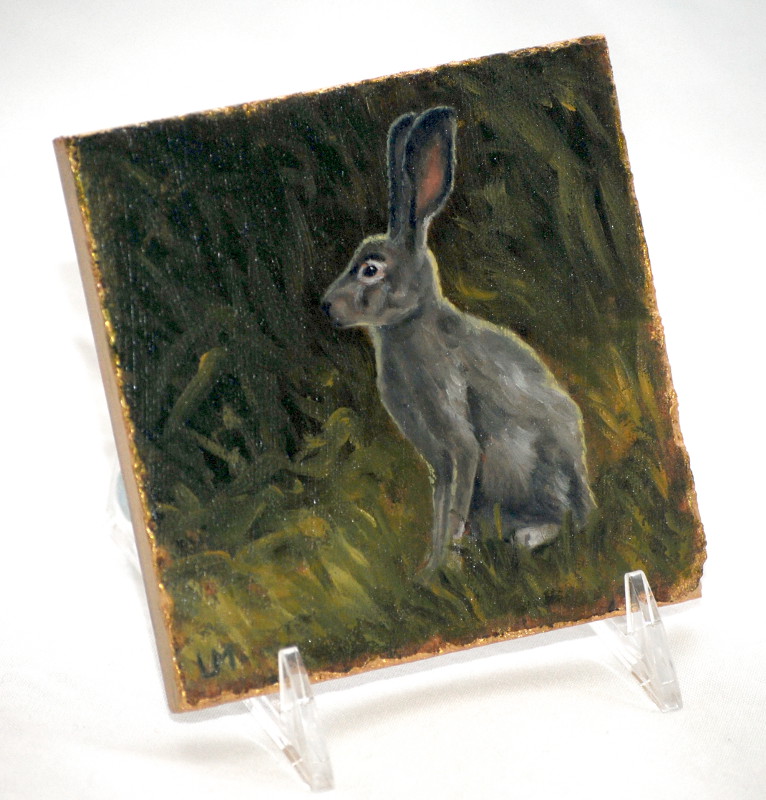
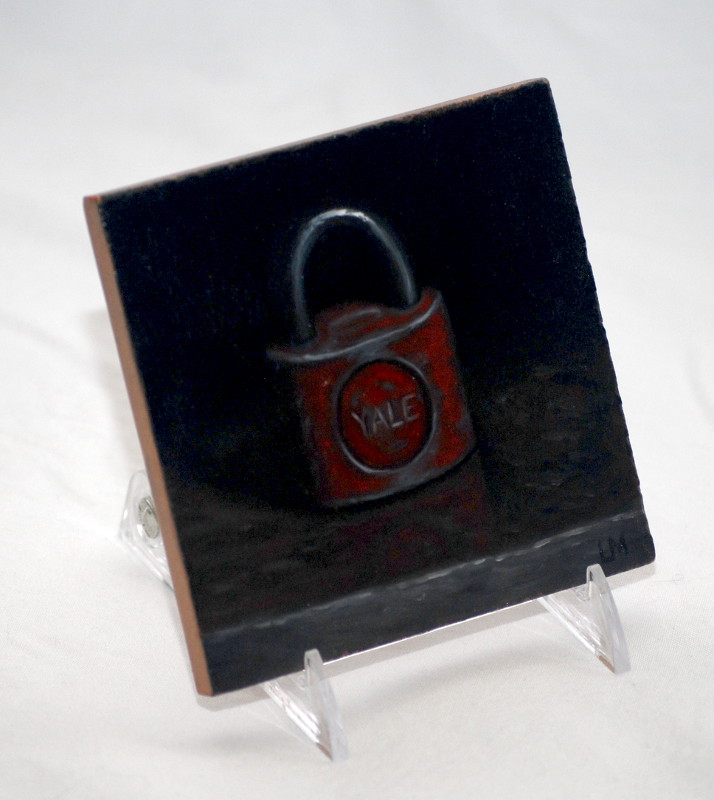
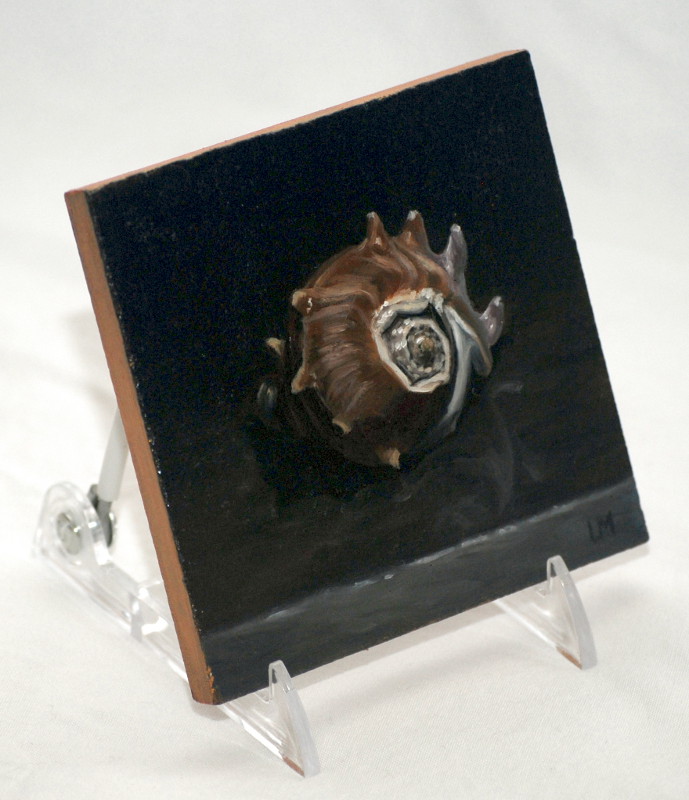
The scraped and sanded panel, ready for painting.


Saturday, February 28, 2015

Works in Progress

Here are several paintings currently in progress, all oil, and all except the iris are 24x36".

Saturday, December 14, 2013

Silk Painting


Each December, it seems, I pick up a new technique, and spend my winter break learning it.  It helps to have an extended period of time to just focus on the new skills needed for that technique.

This year, I'm working on silk painting, and the way I go about it is experiment, experiment, experiment.  Watch videos, read blogs, try things that may be disastrous, try something you think won't work and learn why it doesn't work.  Make happy accidents.  I've been at it about a month now and, after a few dozen scarves, am getting pretty comfortable with the technique.  I hope, though, to keep at it and get some pretty interesting pieces done!


Monday, November 4, 2013

More Tile Paintings

Sleeping Wolf, Oil on Stone, 3x6 inches


Lorikeet, Oil on Granite, 4x4 inches.

Sunday, November 3, 2013

Egret on a Rope

Egret on a Rope, oil on stone, 4x4".


Here is a brand new tile painting - oil on cream-colored marble.  It is 4x4", and has a gold border.

Painting Locke

So I found a Guerrilla Painter 9x12 pochade box on clearance, which meant I had to take it for a test drive this weekend!  I went to Locke, CA, with the Sacramento Plein Air Painters meetup group.  Locke is a turn of the century old-west town south of Sacramento, now owned by the CA State Parks department.


This is 3 hours of work on location - I might work on this painting some more the next time I go to Locke, as I can't use my usual technique of layering during a single session of plein air.  This is painted on a 12x12" sheet of gessoed Dibond aluminum.

Oh yeah, and the pochade box?  Nice.  :)

Saturday, October 19, 2013

Mini Paintings


Here are 2 more miniature paintings finished, these will be varnished and wire-wrapped as pendants.

The tiger is approx. 1 1/4" x 1 1/2", and the egret is 1" x 2 1/4".

Saturday, October 12, 2013

More Pendants


More pendants are coming!  The unwrapped paintings are still in the underlayer stage, and still need 1-2 more painting sessions to finish.  The pendant blanks have all been sanded and are almost ready for painting.

Most of these are 1-2 inches in size.  I'm using Golden Open Acrylics for this project and the wire wrap is silver-filled.  My usual brushes and a penny for size comparison.  :)


Sunday, August 25, 2013

Tile Paintings

Redtail Hawk, oil on pink, grey, and black granite, 4x4 inches.


Soaring - Great Egret, oil on cream marble, 4x4 inches.


Jay, oil on white, grey, and black granite, 4x4 inches.

Sapsucker, oil on cream marble, 4x4 inches.
Here are more tile paintings, all of these are 4x4 inches and have a gold edging. 

Friday, August 2, 2013

Tile Miniatures

I've finished up a few more of the granite and marble tile paintings, these are all 4x4 inches, painted in oil.  They have been edged in gold, and can be displayed on a tile easel or framed.

Cougar, oil on pink, grey, and black granite tile, 4x4 inches.

Tiger, oil on black grey and pink granite tile, 4x4 inches.

Night Owl, oil on black, grey, and white granite tile, 4x4 inches.

Egret, oil on white, grey-striated marble, 4x4 inches.

Thursday, July 18, 2013

Owl - In Progress

Owl in progress, 24x36, oil on canvas

Here's another large one I'm working on - this is the 3rd layer but still have much more work to do on this one.

Wednesday, July 17, 2013

Egret Painting

Egret, 24 x 36 in, oil on canvas.

Here is the final for the large egret painting, I expect to have this in the High Hand Gallery Artstock show in September. This painting is 2 ft x 3 ft.  I have a few more large paintings in the works, too!

Friday, July 5, 2013

Egret - Large Format - In Progress

Egret - in progress - 24x36 inches, oil on canvas.

If this looks familiar, you're right!  A lot of times I'll do a miniature painting as a thumbnail to work out the kinks for a larger painting.  This isn't done yet, but made a lot of progress today - added the entire background.

Working on this for an upcoming large format show in September.

Egret Tile Miniature

Egret miniature, oil on marble, 4x4"

Here is another tile painting finished - this is 4x4 inches on a white marble tile with grey veining.  The polished back side of the tile is left visible, and the edges have a gold border. 

Sunday, June 16, 2013

Marble and Granite Tile Paintings

"Jack" - Oil on granite, 4x4".
Here are a few more tile paintings - these are mainly study and practice for me, doing some still life and animal studies, but I'm really enjoying how they are turning out as well.  I'm finding it really enjoyable to explore different types of surfaces to paint on, as each imparts its own unique texture to the painting.  These three are varnished and ready to go! 


"Yale" - Oil on marble, 4x4".
Shell - Oil on marble, 4x4".
Tile backs, left to right: "Yale", "Shell", "Jack"

Sunday, April 7, 2013

Painting on Stone

Cougar and Shell, Oil on Stone, 4x4 inches

I am starting a new series of miniature paintings on granite, marble, and other stone, and here are the first couple that are almost finished!  I've also included the reverse side - I've kept the polished tile as is, and edged it in gold.  Every tile is different, so the back will not be the same as what is shown here.  Each painting has its own unique texture, created by the grinding marks when the tile was originally made, as well as the texture of the stone itself.

I hope to have these available at High Hand Gallery soon, but as always, if you see something you like on this blog, feel free to inquire, as it may still be available.  :)